
How to add text to a photo so it stays readable
To keep text readable on a photo, make the photo a little darker and give the text a soft shadow. In BoboCreate, select the photo and drag Adjust › Brightness down. Then select the text, tick Effect › Shadow, and give it a big Blur.
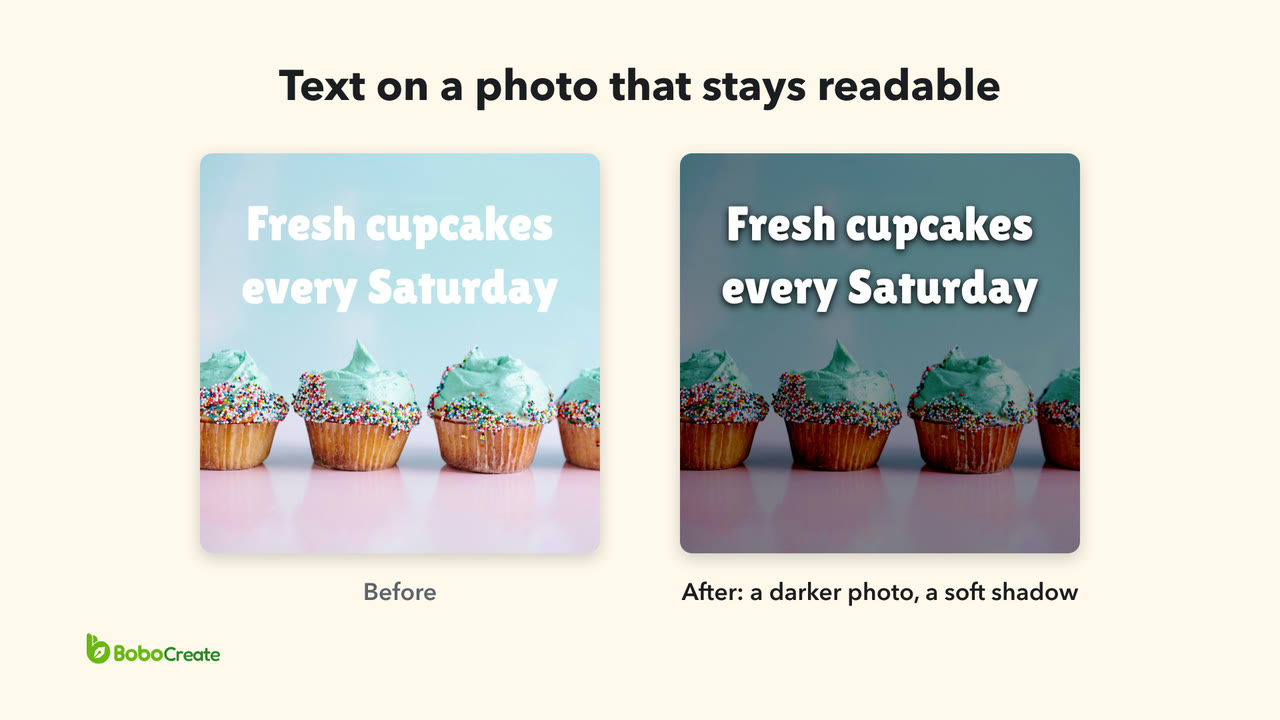

Here the post is a Square post 1080 × 1080 px with a photo of cupcakes against a light sky, and white text in Lilita One. White on a light sky is hard to read, which is what the two changes below fix.
Put the photo on the page
-
Start a square post
In the library, click New design. Type square in Size, choose Square post 1080 × 1080 px, give it a Name, and click Create.
-
Click Image at the top
Choose your photo: a PNG, JPG, WebP or SVG file, up to 32 MB. It goes in the middle of the page, half as wide as the page.
-
Click Fill
It's under Element in the panel on the right. The photo grows to cover the whole page, centred, and loses whatever sticks out. Fit shows all of it instead.

Add your text
-
Click Text at the top
A text box that says New text appears on the page.
-
Type your words
Type in the box under Text style on the right. Press Enter to start a new line.
-
Pick a font
Click the font's name under the box, type part of the one you want, and click it. Lilita One, a thick, rounded font, comes with the app. Thick letters like these hold up well on a photo.
-
Set the size and the colour
Here Size is 130 px, and the Colour is #ffffff, white: type the code in the box next to the little square.
-
Move it with Y
Under Transform, Y is how far the text is from the top of the page. Here it's 120, so the text sits over the sky.

Make the photo darker
-
Click the photo
Click a part with no letters on it, so the photo is selected, not the text.
-
Drag Brightness down
It's the first slider under Adjust, from −100 to 100. Drag it to the left, or type a number in its box. Here it's −40.

How far to go depends on the photo. Go as far as the text needs, and stop while the photo still looks like itself.
Give the text a soft shadow
-
Click a letter
Click right on a letter to select the text. A click between the letters goes through to the photo.
-
Tick Shadow
It's under Effect. The shadow starts black, 10 px to the right of the letters, with no blur: a hard, dark copy of them.
-
Set X 0 and Y 6
Now the shadow sits just under the letters.
-
Drag Blur to 20
Blur goes from 0 to 100. The more blur, the softer the shadow.

A soft shadow like this is hard to see as a shadow. It gives every letter a dark edge, so the text stays clear over the light parts of the photo too. For an outline or a glow instead, see how to outline text.
Export a JPG
-
Click Export, then JPG
Export is at the top right. Keep Resolution at 2× — 2160 px wide: the line under it reads 2160 × 2160 px, twice the size of the page.
-
Click Export JPG
Choose where to save the file.

Three other ways

A colour overlay
Select the photo, and under Adjust, tick Colour overlay. It starts pink, with Mode set to Tint and Strength 50. Type #000000 for black, and set Strength to taste: here it's 45. The overlay can be any colour, such as a dark blue or a dark brown that matches the photo.

A band behind the text
Click the rectangle button at the top. A blue square appears; type #000000 in its Colour. Under Transform, click the chain button after W and H so that width and height change separately, then set X 0, Y 330, W 1080 and H 420. Under Opacity & blending, set Opacity to 55, so the photo shows through. Then add the text: each new item goes on top of the ones before it, so add the band first.

A plain, dark part of the photo
Some photos have a calm, dark area: a wall, a table, the sky at night. Put white text there and it needs nothing else. In the muffin photo above, the text sits on the dark background over the muffin.
Where it goes wrong
- A click selects the photo, not the text. The text is picked by its letters, so a click between them selects the photo under them. Press Esc to select nothing, then click right on a letter.
- The shadow looks like a second copy of the letters. Its Blur is 0. Drag Blur up, and set X to 0 so it isn't off to one side.
- The photo doesn't cover the page. Select it and click Fill.
- The band covers the text. The band was added after the text, so it's on top. Select the text and press ⇧⌘] (Shift+Ctrl+] on Windows) to bring it to the front.
- One part of the text is still hard to read. Make the photo a little darker, give the shadow more Blur, or use a band behind the text.
This one needs the BoboCreate app
Your own photo goes in with the BoboCreate app: BoboCreate Online has no photo upload. Text, fonts and Shadow are free to try in your browser.
BoboCreate Online is free, with no account. Its downloads carry a small “Made with BoboCreate” mark; the BoboCreate app exports without it, and adds photos, video, cutting files and print quality.